Friday, May 02, 2008

a method of weaving in yarn ends

last year a fellow knitter showed me a way of weaving in ends I hadn't come across before and haven't come across since. I don't know what it's called but it's relatively quick and easy so I like it a lot. I don't have a way of making a video but I took some photos to illustrate. hopefully this will make sense!

when done in the same color yarn, this method is almost invisible on both the knit and the purl sides. it works best with a tightly-knitted gauge and a grippy yarn.

the basic idea is that you wrap the yarn end around one side of a column of stockinette Vs. stick the needle from right to left around the right leg of each V and work your way up for a couple of inches, then turn, move the end to another column, and repeat in the opposite direction.

this can also be done on the purl side, but while it is invisible on the knit side, it does show up on the purl side. instead of going up a column of stitches, you work from side to side, catching the purl bumps from right to left.

here are some pictures of how this is done on the knit side of stockinette.


bring the end to be woven up through the middle of the V of a knit stitch.
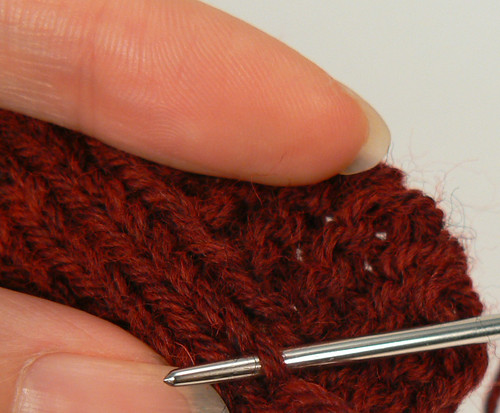

stick the needle under the right leg of the stitch above, working from right to left.
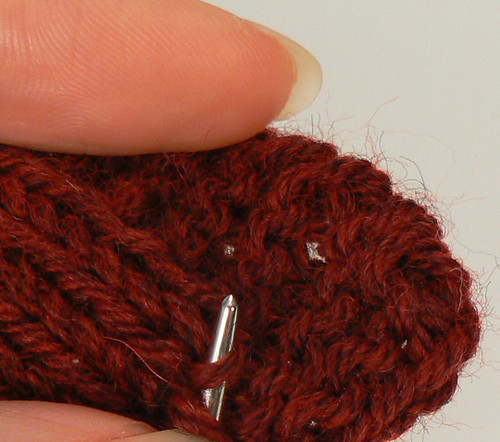

bring the needle tip around to do the same to the next stitch above.
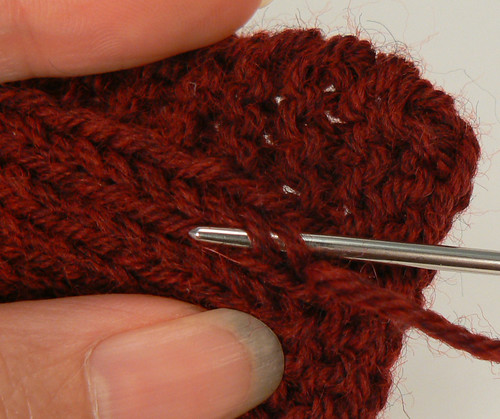

like so.
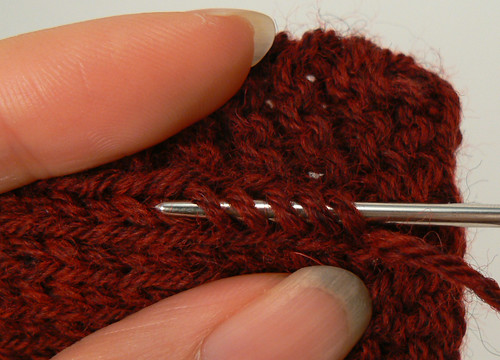

continue wrapping the stitches for a couple of inches.


pull yarn through and then give the fabric a tug to smooth it out.
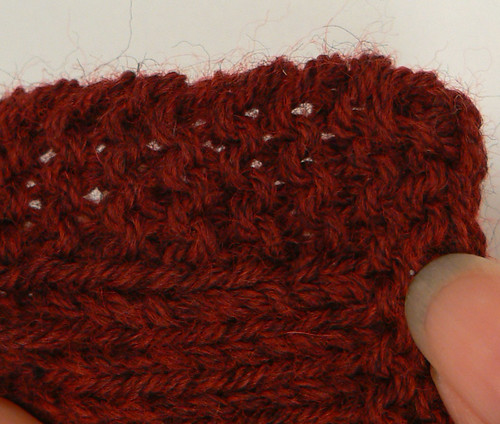

like so. bring the yarn up through a stitch in the next column and repeat in the opposite direction.

when you're using the same color yarn the result is fairly invisible on the knit side and the purl side, but if you're using a contrasting color yarn, it's not invisible on the knit side but it is on the purl side.

here's how it would look with a contrasting color.
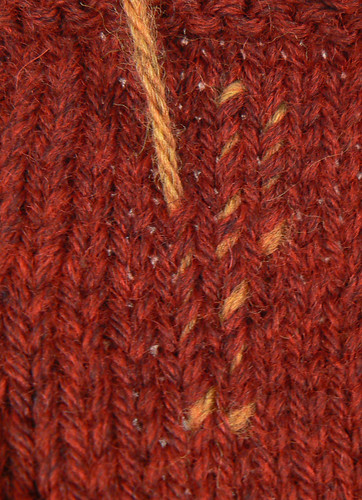
yeah, not so good.

so work it on the purl side. here's how.
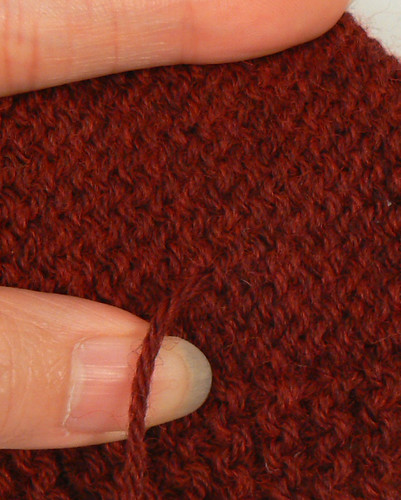

bring the end to the purl side.

stick the needle through a purl bump from right to left. I see the bumps like parentheses. some look like ( and others look like ). you can weave in the yarn on either type of bumps, but stick with the same type for each row.


I picked the ) bump for this row.
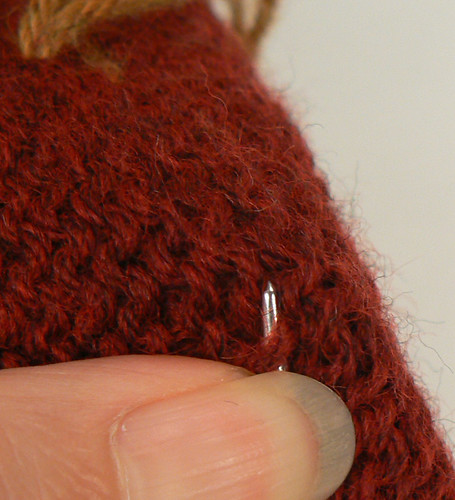

aim for the next purl bump of the same sort.


keep going for a couple inches.
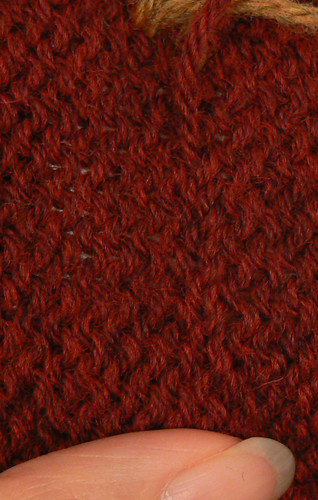

pull the yarn through and tug at the fabric to smooth it out.
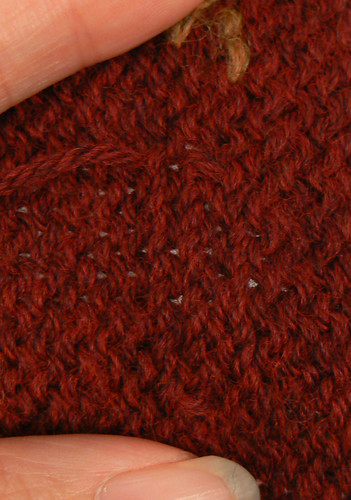

turn and work in the opposite direction on another row of purl bumps. I like to change directions at least twice.
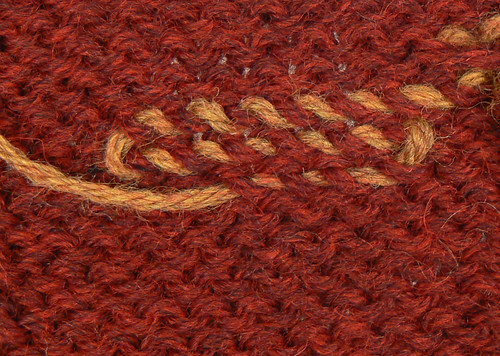

this is how it looks in a contrasting color. not invisible at all but it doesn't show up on the knit side. and if the knit side is the right side, then that's all that matters.

so that's one method of weaving in yarn ends. if anybody uses it and likes it or knows what it's called, let me know!

Saturday, April 26, 2008

Rogue from X-Men scarf recipe

(I'm writing this up to put on Ravelry. I figure that if I'm going to put pattern notes in the project I might as well write up the pattern recipe.)

recently I came across a couple scarves I had made several years ago. I had based them on a long, skinny purple scarf that Rogue wore in the first X-Men movie. she seems to have at least two of them, one more sparkly than the other. they both seem to be knitted in a very loose stockinette stitch and allowed to curl.

materials:
50-100 grams of dark purple sport to worsted-weight yarn (50g should be enough but if you want the scarf extra long, you may need more.)
knitting needles, much larger than what you would normally use. US 11, 13, or possibly even 15.

recipe:
cast on about 20 stitches. work in stockinette until the scarf is long enough to wrap around your neck two or three times and reach down to your knees, or however long you want it. bind off.

for the first scarf I made, I only had 50 grams of light worsted wool and cast on 15 stitches. for the second one I had 100 grams of Cascade Pima Tencel color #2493 and cast on 20 stitches.

so far this is the best picture I've found of Rogue wearing the scarf. in the movie it looks more purple.


I might try taking screenshots.

gauge should be nice and loose. keep in mind while you're knitting that it will look much wider than it will end up when you wear it, as the fabric will pull down, curl, and become narrower when it is worn.


the left side is more like how the fabric will look when the scarf is worn; the right side is more like how it looks when you're knitting it.

finished scarf:


edited to add screenshots.

it looks like she could have 3 different scarves, the sparkly one, a non-sparkly one, and possibly a mostly non-sparkly one with sparkly sections. or the non-sparkly one has the sparkly sections but they don't show up all the time. the scarf also looks like it would uncurl to be much wider than the ones I made.

sparkly throughout:


not sparkly:


closeup of loose stockinette stitches:


very curly edges:


another no-sparkly closeup:


sparkly patches? (see also magazine scan above)


Tuesday, November 06, 2007

Sealed with a Hug

This doesn't really need a pattern but I felt like writing up the recipe anyway.

With bulky yarn and suitable needles, cast on 5 stitches (or as many as needed to fit around your tube of lip balm) and knit in garter stitch for about 7 inches (or until it will fit, slightly stretched, lengthwise around your tube of lip balm). Cast off. Fold ends towards center and sew the sides together.
In one corner, pick up three stitches. Knit i-cord for 1 1/2 inches (or as long as necessary to make a loop). With keyring on i-cord, sew down the end to the cozy to make a loop.

Adapt as you like. Knit in stockinette or in sock yarn and with a lacy pattern. This cozy is smaller than a swatch, so go ahead, be daring!


Saturday, October 20, 2007

Holding Hands, Feeding Ducks pattern


This is a scarf based on star stitch.
The name comes from a song by The Brunettes.

“Holding hands, feeding ducks
When I met you, that's what I wanted to do”

Yarn: Handpaintedyarn Colonia 140 or other thick-and-thin aran weight yarn, around 1.5 - 2 100-gram skeins.

Needle size: US 10.5 / 6.5 mm

Gauge: Doesn't really matter. Vary yarn and needle size to get the fabric you want. I recommend using bigger needles than you normally would for the yarn.

Abbreviations:
RS: right side
MS: make star--purl three stitches together but leave the stitches on the left needle. Wrap yarn around the working needle once, then purl the same 3 stitches together again.
P: purl
K: knit

Star stitch:
Multiple of 4 stitches + 1 (i.e. 17, 21, 25, 29...)
Row 1 (RS): Knit all stitches
Row 2: P1, (MS, P1) repeat to end
Row 3: Knit
Row 4: P3, MS, (P1, MS) repeat to last 3 stitches, P3
Repeat these 4 rows.

Additional notes:
Making the star is easier if you knit loosely and/or use a bigger needle size than usual.
When deciding how many stitches to cast on for the width you want, keep in mind that scarves tend to stretch lengthwise and thus become narrower when worn.
The edges of this stitch pattern will tend to curl.
This stitch is not reversible; there is a right side and wrong side.

Scarf Pattern:
Cast on 25 stitches (or other multiple of 4 stitches +1) and work in star stitch till desired length.
Long tail cast on counts as the first knit row (otherwise there is a purl ridge at the edge).
Bind off on RS. I like the sewn bind-off.

updated 11/21/2010